imitone makes it quick and easy to get started improvising and making music, using only your voice. In just a few quick steps, we’ll show you how to get it set up and running.
1. Make sure you have everything you need.
To start using imitone, you’ll need just a few things (aside from the imitone software itself, of course):
- A microphone – imitone needs to be able to hear you somehow!
- Headphones – While not technically necessary, headphones are strongly recommended to keep imitone from hearing itself and getting confused.
- A music-making app with midi support – also known as a DAW (digital audio workstation), this is the program that’s going to receive and record midi information from imitone, as well as let you play a wider variety of instruments. There are tons of DAWs out there; for Mac users, we recommend GarageBand as it is free and comes pre-installed on your Mac. For Windows users, we encourage you to do research into what DAW will best suit your needs, but a few we can suggest may include:
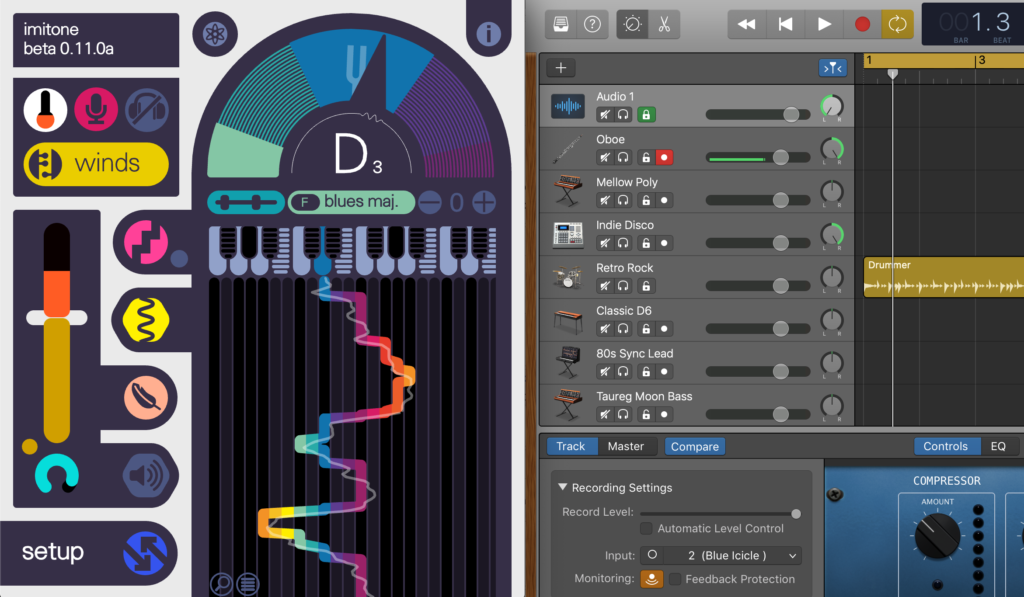
2. Open imitone.
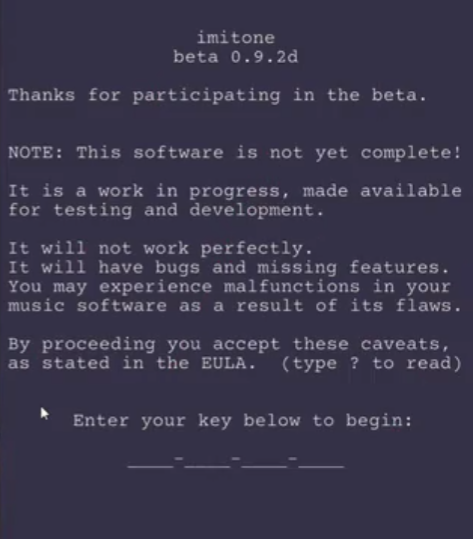
If it’s your first time with the software, you’ll need to enter your 16-digit key to activate it. You should be able to simply paste your key in and have it activate right away.
It’s important that you open imitone before your DAW, as this will allow your DAW find imitone’s virtual midi input device when it opens.
3. Open your DAW or other music-making app.
You may need to set imitone as the app’s “midi input” somewhere in the app’s settings. This works the same way as connecting another midi controller, such as a USB keyboard, so you should easily be able to find a tutorial that covers how to connect a midi controller to your specific program.
From here, you can set up a track for recording and playing, and pick one of your program’s instruments (or a downloaded plugin instrument, such as a VST), and imitone will be able to control that instrument. Once again, the way this works is slightly different for every program, but you should easily be able to find a tutorial that covers the basics in the program you’re using.
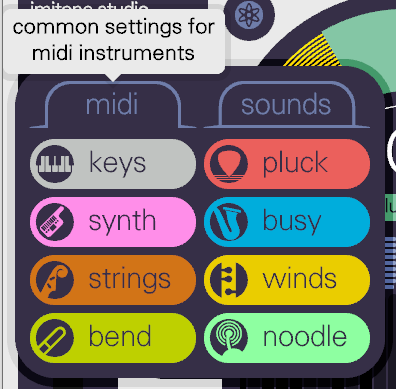
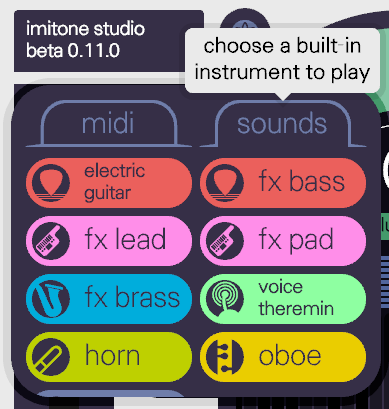
If you just want to play imitone’s built-in instruments, which currently do not allow audio or midi export/recording, but may still be fun to improvise with or train your voice to, you can change to an “instrument” mode in imitone by clicking on the current midi preset (below the title banner and status icons) and changing it to an instrument.
4. Sing into your mic.
imitone is trained to understand voices, but it will also respond just fine to humming, whistling, and playing instruments! Note that if you’re whistling, or playing a very high-pitched instrument, you may need to change the pitch range to the “whistle” range to help imitone hear you.
And that’s all it takes!
With those simple four steps, you should be able to play any instrument by just singing into your microphone with imitone. From here you can check out our video tutorials, or keep an eye on this blog for future tips and tricks.